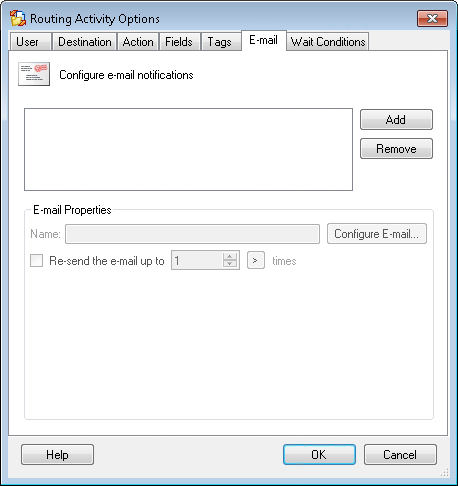
This ![]() tab contains options for Laserfiche Routing activities. It enables you to configure an e-mail that will be sent to one or more people. You can configure this tab to send additional e-mail notifications depending on how long it takes for this activity's wait condition to be satisfied.
tab contains options for Laserfiche Routing activities. It enables you to configure an e-mail that will be sent to one or more people. You can configure this tab to send additional e-mail notifications depending on how long it takes for this activity's wait condition to be satisfied.
Example: After routing an entry to a specific person, you can schedule e-mails to be sent to that person based on how long they take to complete the task.
Note: All settings in this tab are optional. If you do not configure this tab, no e-mails are sent as part of this routing activity.
To open the E-Mail tab
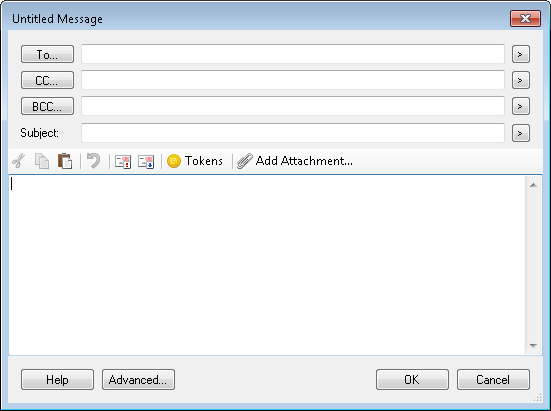
To configure an e-mail
 to use tokens. Alternatively, click To, CC, and/or BCC. Clicking any of these buttons opens the Find User dialog box which allows you to search for a user.
  or low priority
  buttons to give your e-mail a priority level.
To change or remove e-mails
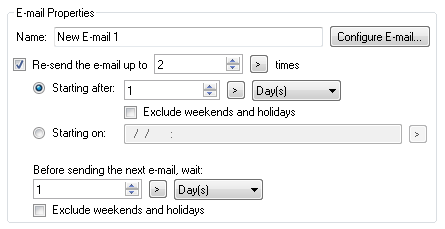
To send escalating e-mail notifications
Note: If you choose to send escalation e-mail notifications, no e-mail is sent initially when the activity runs. The first e-mail is sent based on the Starting after or Starting on time and subsequent e-mails are sent based on the Before sending the next e-mail, wait time.
 to specify the maximum number of times the e-mail will be sent. Alternatively, click the Token button (right arrow) to use tokens.
Note: The e-mail is sent according to the configured schedule until the routing activity's wait condition is met. Once the wait condition is met, no further e-mails are sent.
to use tokens, or use the scroll box (up-and-down arrows) to specify a length of time. Select Minute(s), Hour(s), or Day(s) from the drop-down menu to specify a unit of time. Check Exclude weekends and holidays to only include business days in the time calculations. to use tokens to specify the date the first e-mail will be sent.. Alternatively, click the Token button (right arrow) to use tokens. Select Minute(s), Hour(s), or Day(s) from the drop-down menu to specify a unit of time. Check Exclude weekends and holidays to only include weekdays in the time calculations.Note: See the Holidays node in the Workflow Administration Console to define holiday settings.
|
This documentation is specific to version 9.0. You can find the most up-to-date help files for the latest version at Current Online Laserfiche Product Help Files. For further help or feedback, please see the Laserfiche Support Site. |
© 2013 Laserfiche |